3D printing of a replica using Monocle Scans

Last Updated: 2025.Dec

3D printing workflow overview

Project Overview

In this guide, we'll walk you through the steps of 3D printing of a replica using the Monocle Prime app.

Check this guide and let's proceed together!

Why not download the files and give it a try!

What is UltiMaker Cura?

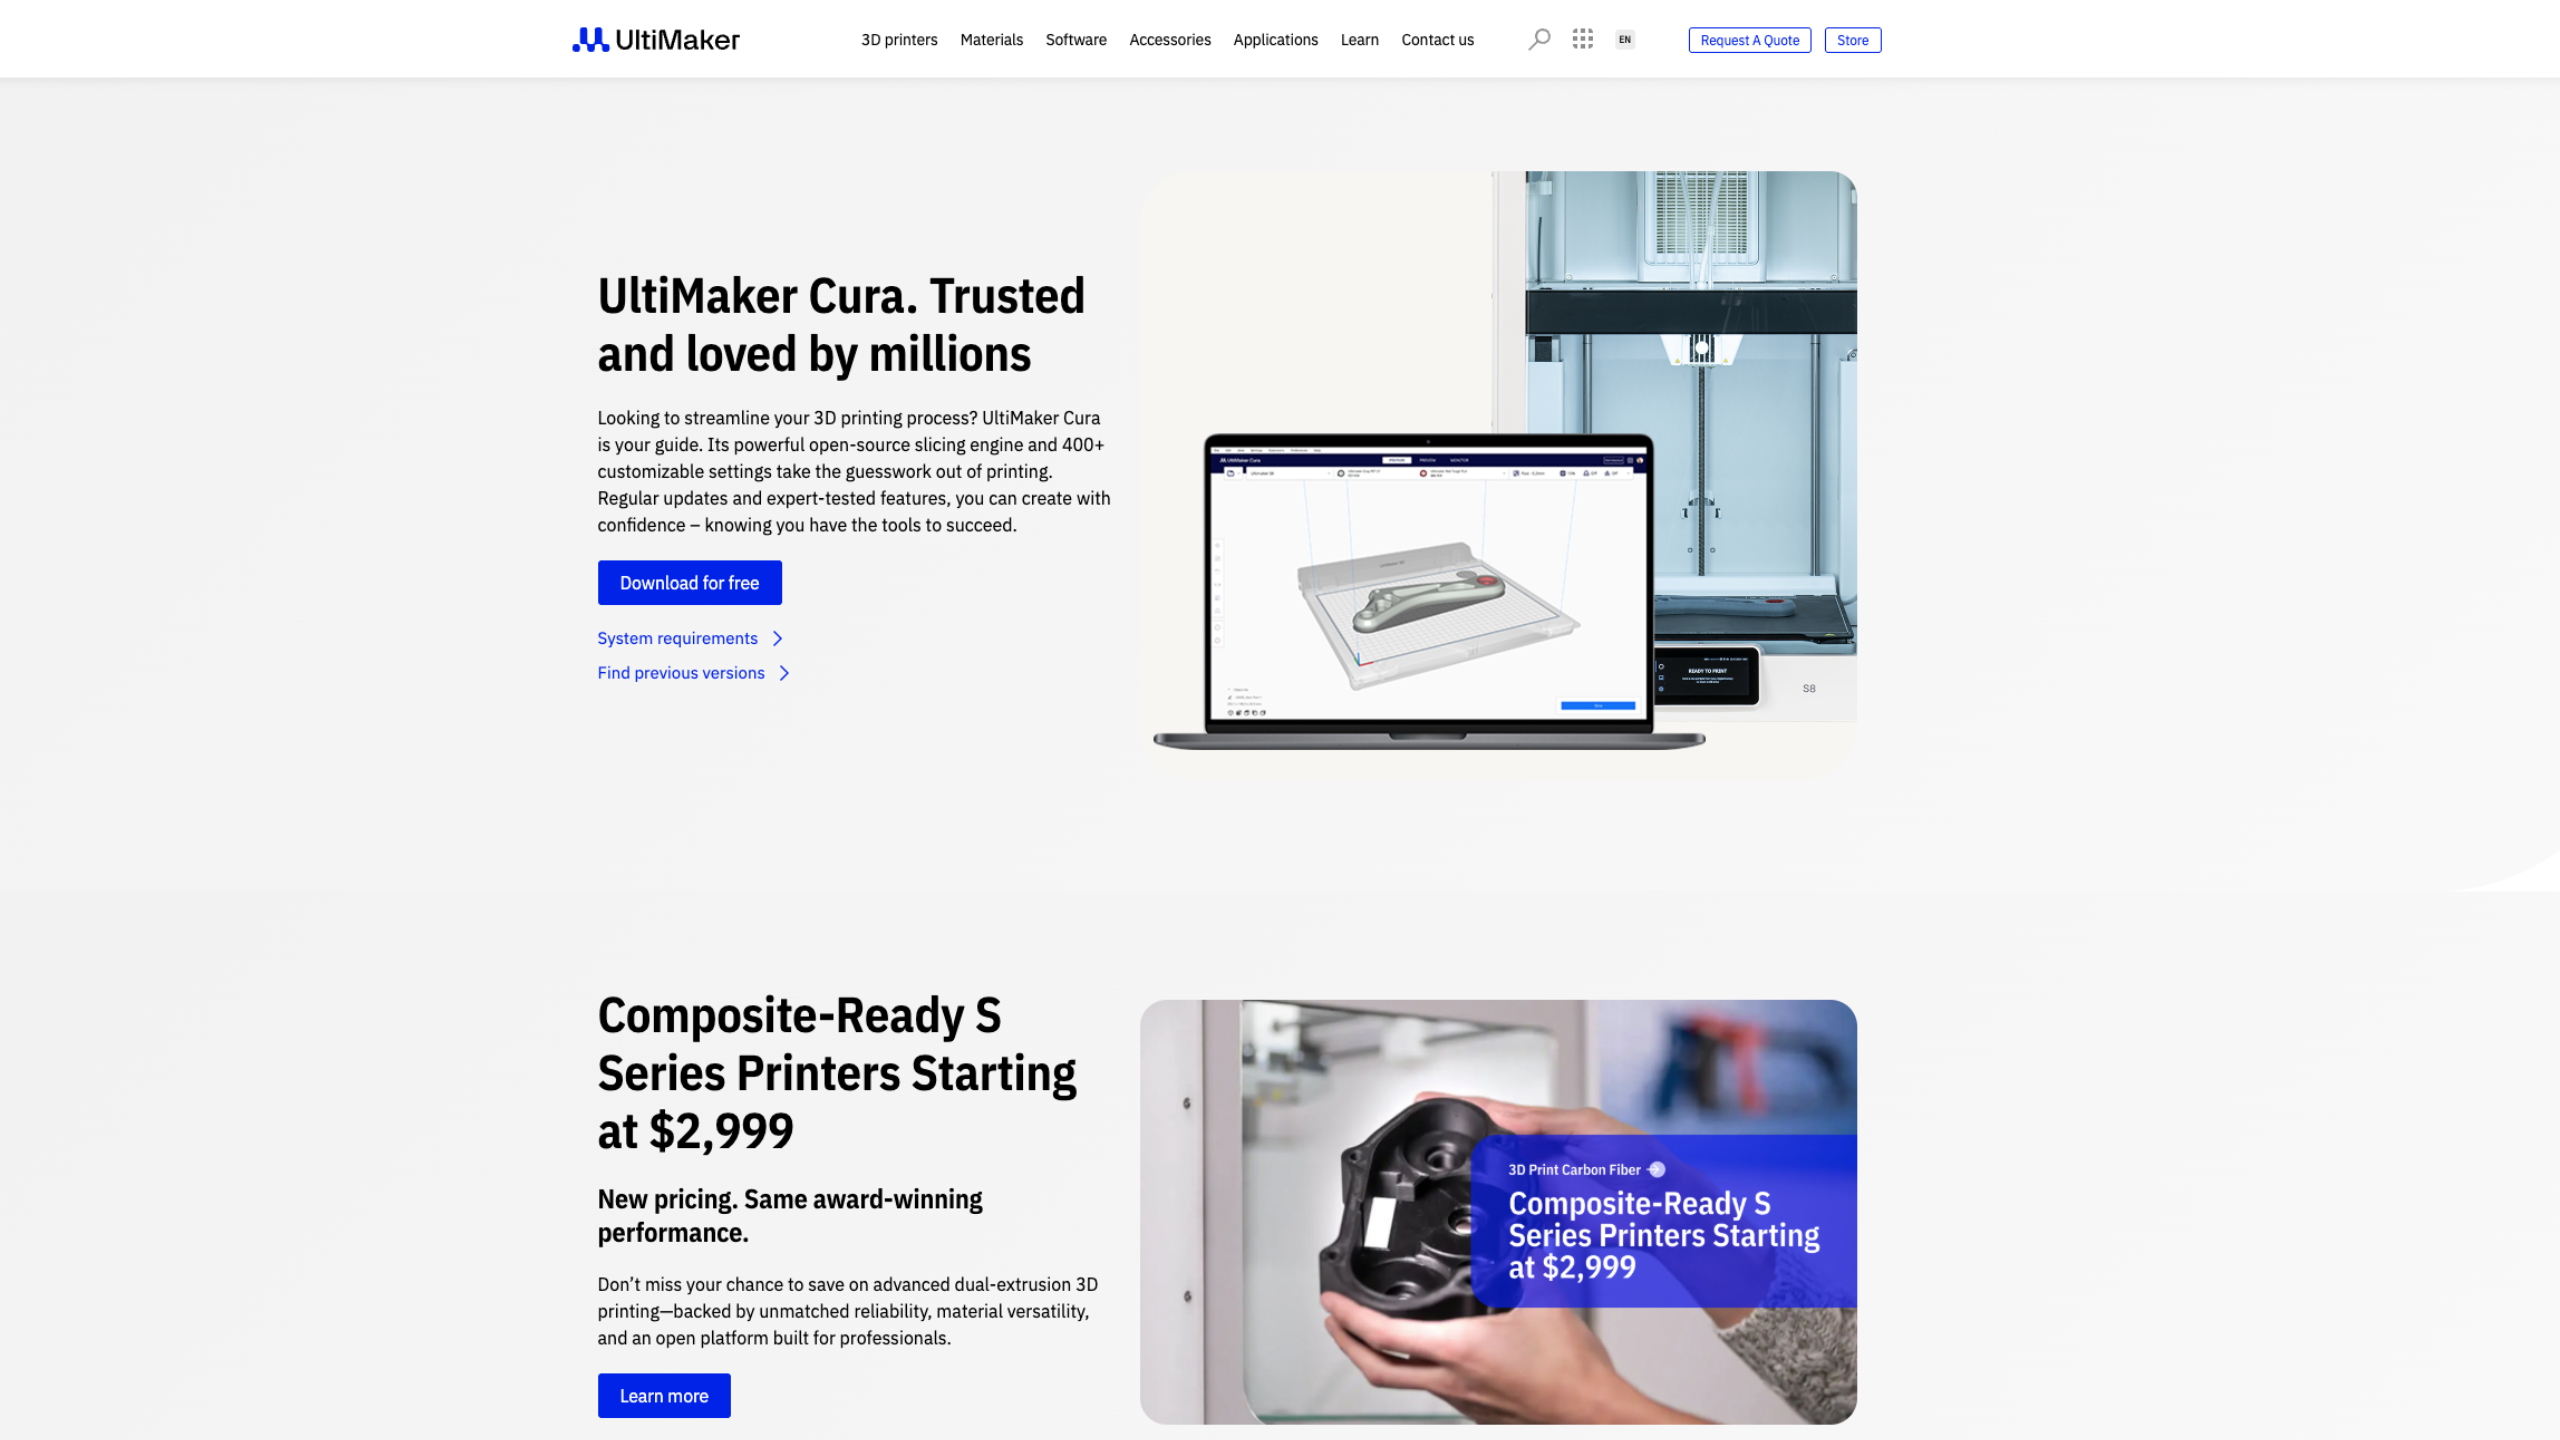
Ultimaker Cura is a free slicing software designed for 3D printing. It takes 3D models (such as STL or OBJ files) and converts them into G-code instructions that a 3D printer can understand.

Users can fine-tune every aspect of their print — including layer height, infill density, supports, print speed, and temperature. With its intuitive interface and powerful customization options, Cura is easy enough for beginners yet precise enough for professionals.

It supports a wide range of 3D printers, not only from Ultimaker but also from many other brands, making it one of the most popular slicers in the world.

Tutorial: How to 3D print a replica using Monocle Scans

The content is explained step-by-step with accompanying images.

Step 1: Download Glb file from Monocle Gallery

  • Go to Monocle Gallery on your computer and log in
  • Select the model you want to use
  • Press the Glb file button to download

Step 2: Download and install Ultimaker Cura

Step 3: Select printer

  • Open Ultimaker Cura
  • Click 'Get Start' button, 'Agree' button, and 'Next' buttton
  • Select your printer

Step 4: Add printer

  • Search the printer you want to use
  • After selecting the printer, click the 'Next' button
  • UltiMaker Cura initial screen appears.

Step 5: Let's have a look at the overview screen

  • ① Open File : Open a file here or drag and drop a 3D file
  • ② Printer Type : During the initial setup, you selected a printer; to change it, modify the printer type here.
  • ③ Material and Nozzle Size Setting : Select the material type. This time, choose PLA
  • ④ Print Setting : Print output settings
  • ⑤ Stage : Box displaying a 3D model

Step 6: Import your 3D file using drag and drop it

  • Drag and drop the 3D file (Glb or Stl) directly to the screen

Step 7: Object setting

Step 8: Printing setting and slice

  • Print settings can be selected from either Simple Settings or Custom Settings. This time, only Simple Settings will be used.
  • Resolution: Fine-0.15mm / Infill Density: 10 / Infill Pattern: Tri-Hexagon / Shell Thickness: 0.8mm / Support: on / Support Structure: Tree / Placement: Everywhere / Adhesion: on
  • Once the print settings are complete, click the slice button in the bottom right corner.

Step 9: Check the result and save to the disk

  • Once you have finished checking, click 'Save to Disk' in the bottom right corner to save it in .gcode format inside the USB.

Note

  • Please select slicer software compatible with the printer you are using.

What is 3D printer??

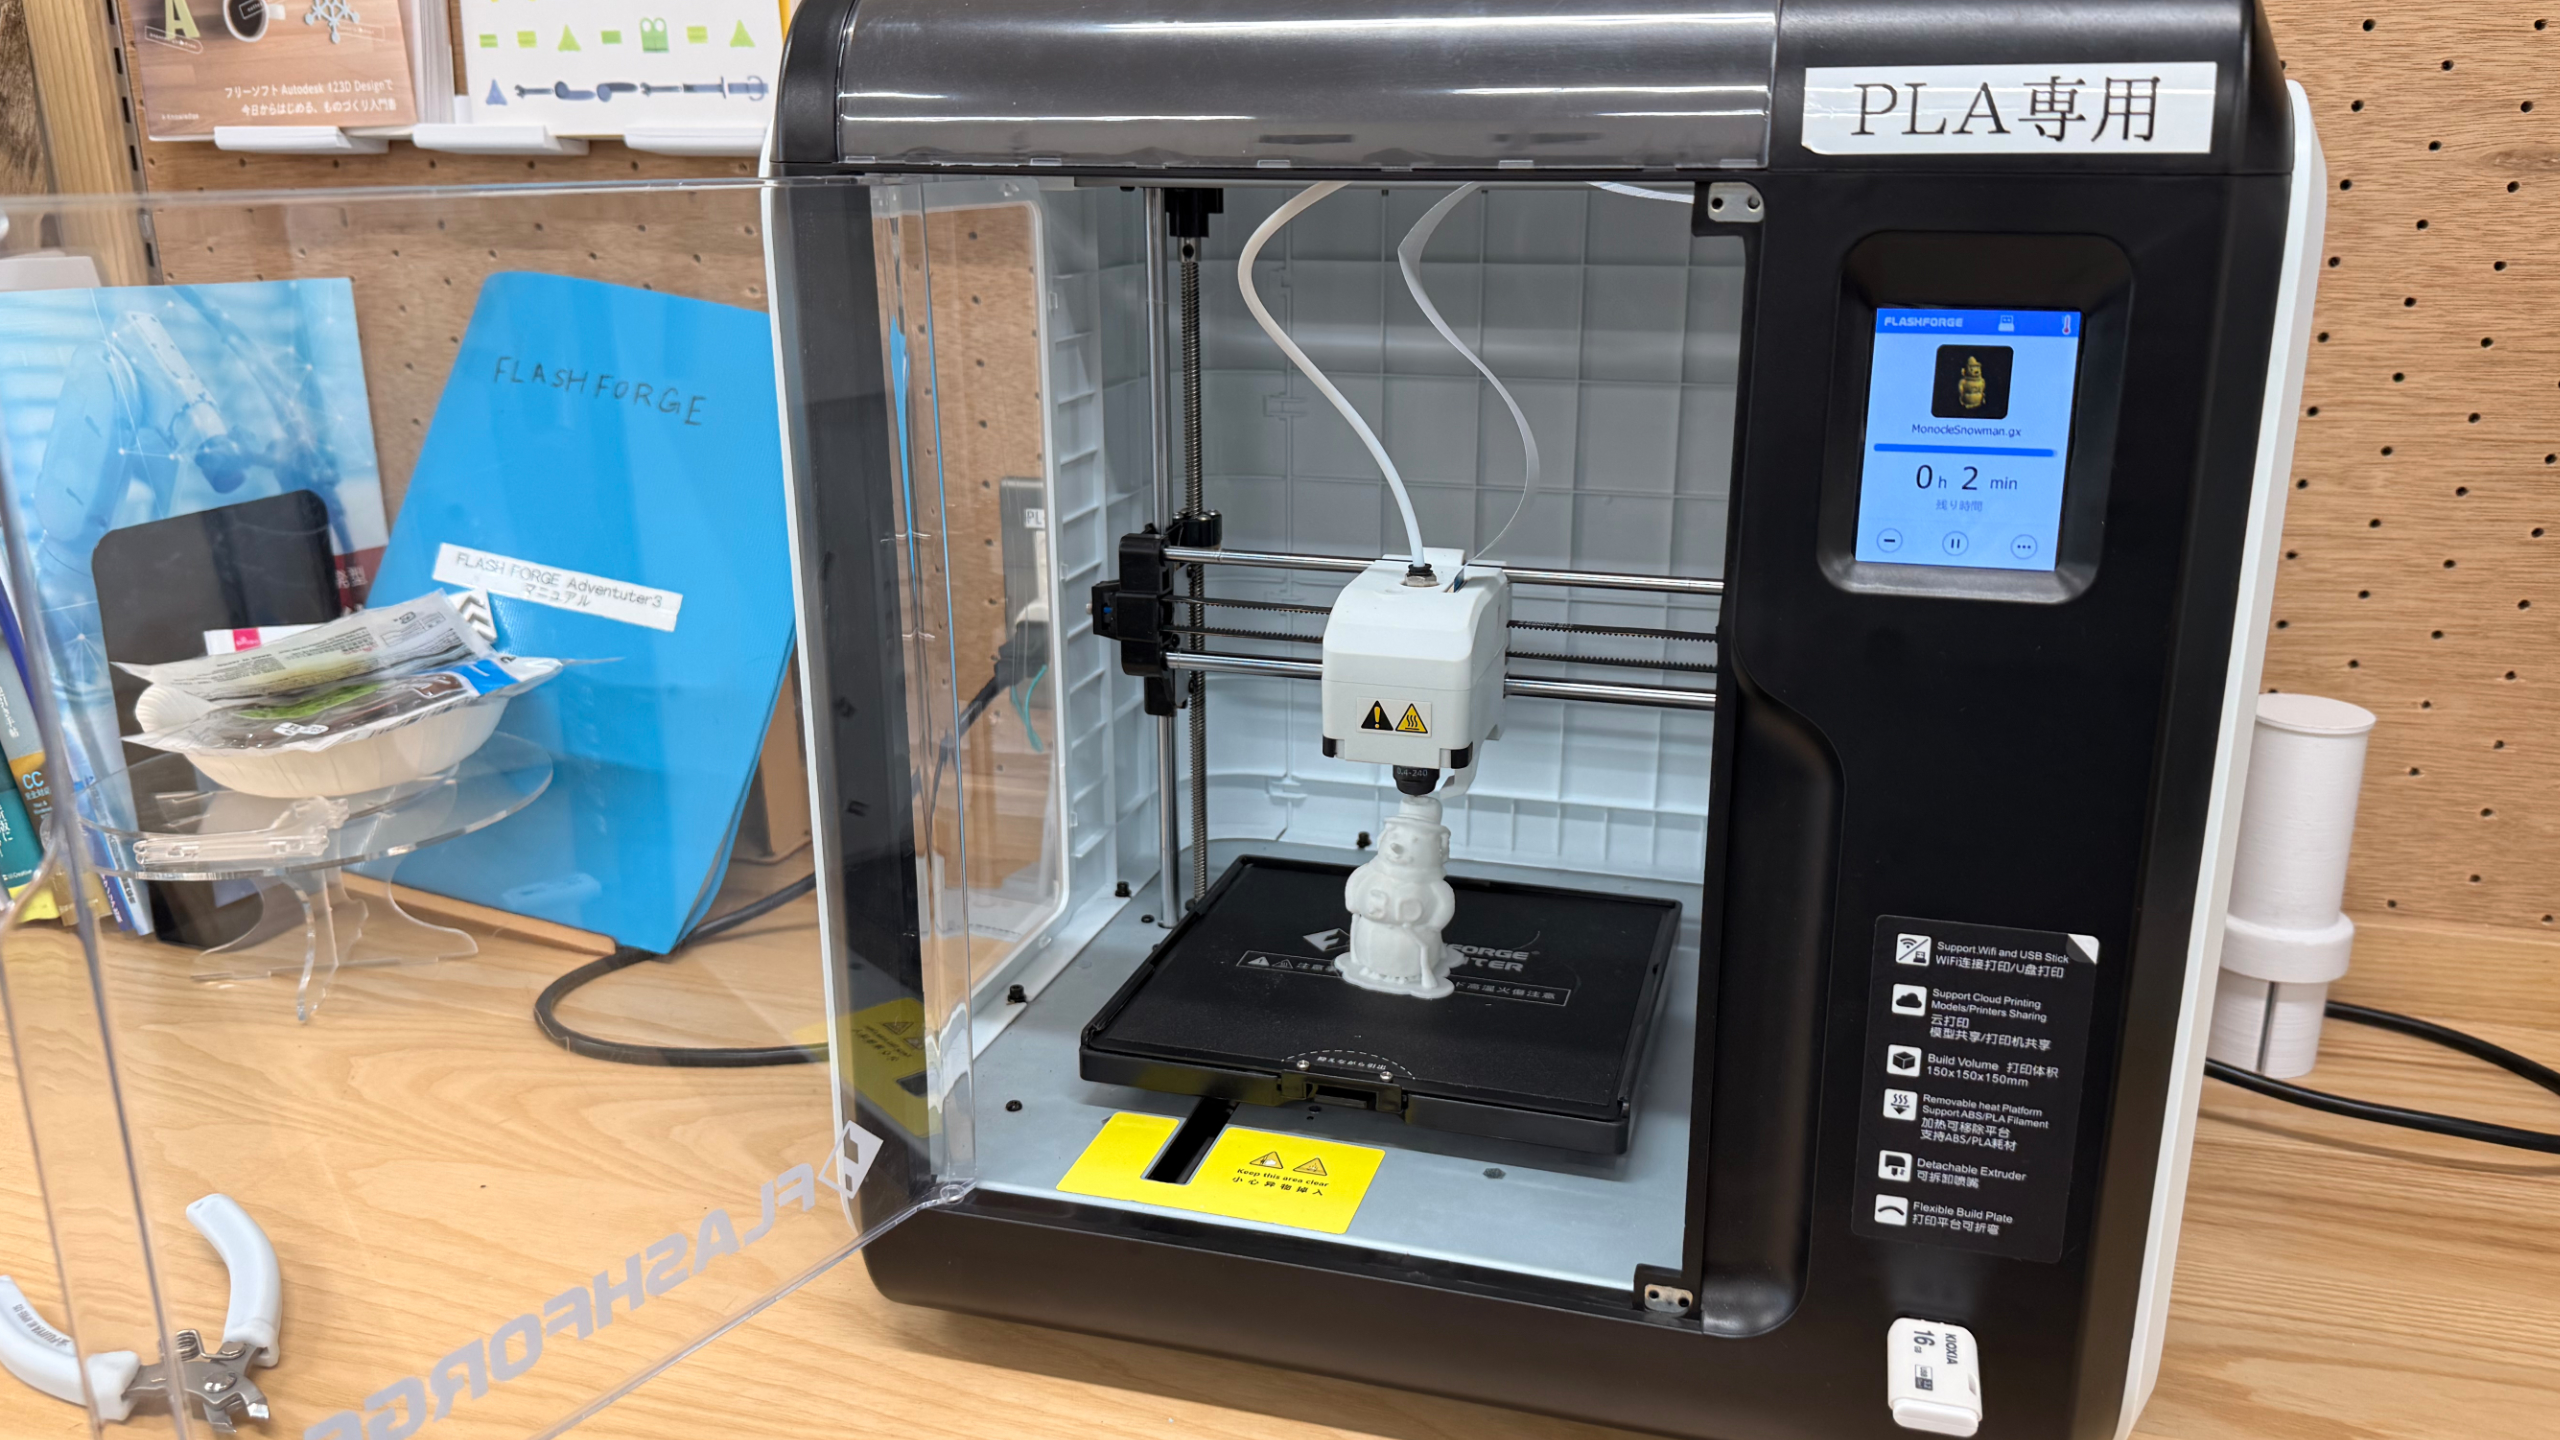
A 3D printer is a device that creates physical objects from digital data. Using scanned 3D models or designs created in software, it builds objects layer by layer with materials such as plastic, resin, or metal.

Because it allows ideas to quickly take shape, 3D printing is widely used in prototyping, product design, education, healthcare, and art.

You can even take your 3D models scanned with Monocle and bring them to life as real physical objects through 3D printing.

Step 10: Prepare for 3D printing

  • Switch on the power and warm up the 3D printer.
  • Insert the USB memory stick into the 3D printer and select the prepared data.
  • Start printing

Step 11: Remove the support

  • Once finished, remove the printing table
  • Remove carefully the support material from the printing table.

All done!

3D-printed objects can be made even more attractive by removing layer lines using modelling clay or sandpaper, then painting them with spray paint or acrylic paint!

Coloured the 3D model!

I've painted the object printed on the 3D printer! He looks much more appealing now! Let's try 3D printing objects scanned with Monocle Prime!

The location where I have used a 3D printer

Ota City Minami-Rokugou Startup Support Facility │Rokugo BASE: https://rokugobase.com/prototype/

  • 3D printer: G-Zero / Adventrue3 / Raise3D Pro2 / Raise3D E2
  • Experienced staff are always available to help, so even beginners can use their 3D printing services with confidence.