Loading Monocle Prime Scans onto the Looking Glass Go

Last Updated: 2025.March

Project Overview

In this guide, we’ll walk you through how to load 3D scans made with the Monocle Prime app onto the Looking Glass Go.

Check out the video and follow along with this guide!

What is Looking Glass Go?

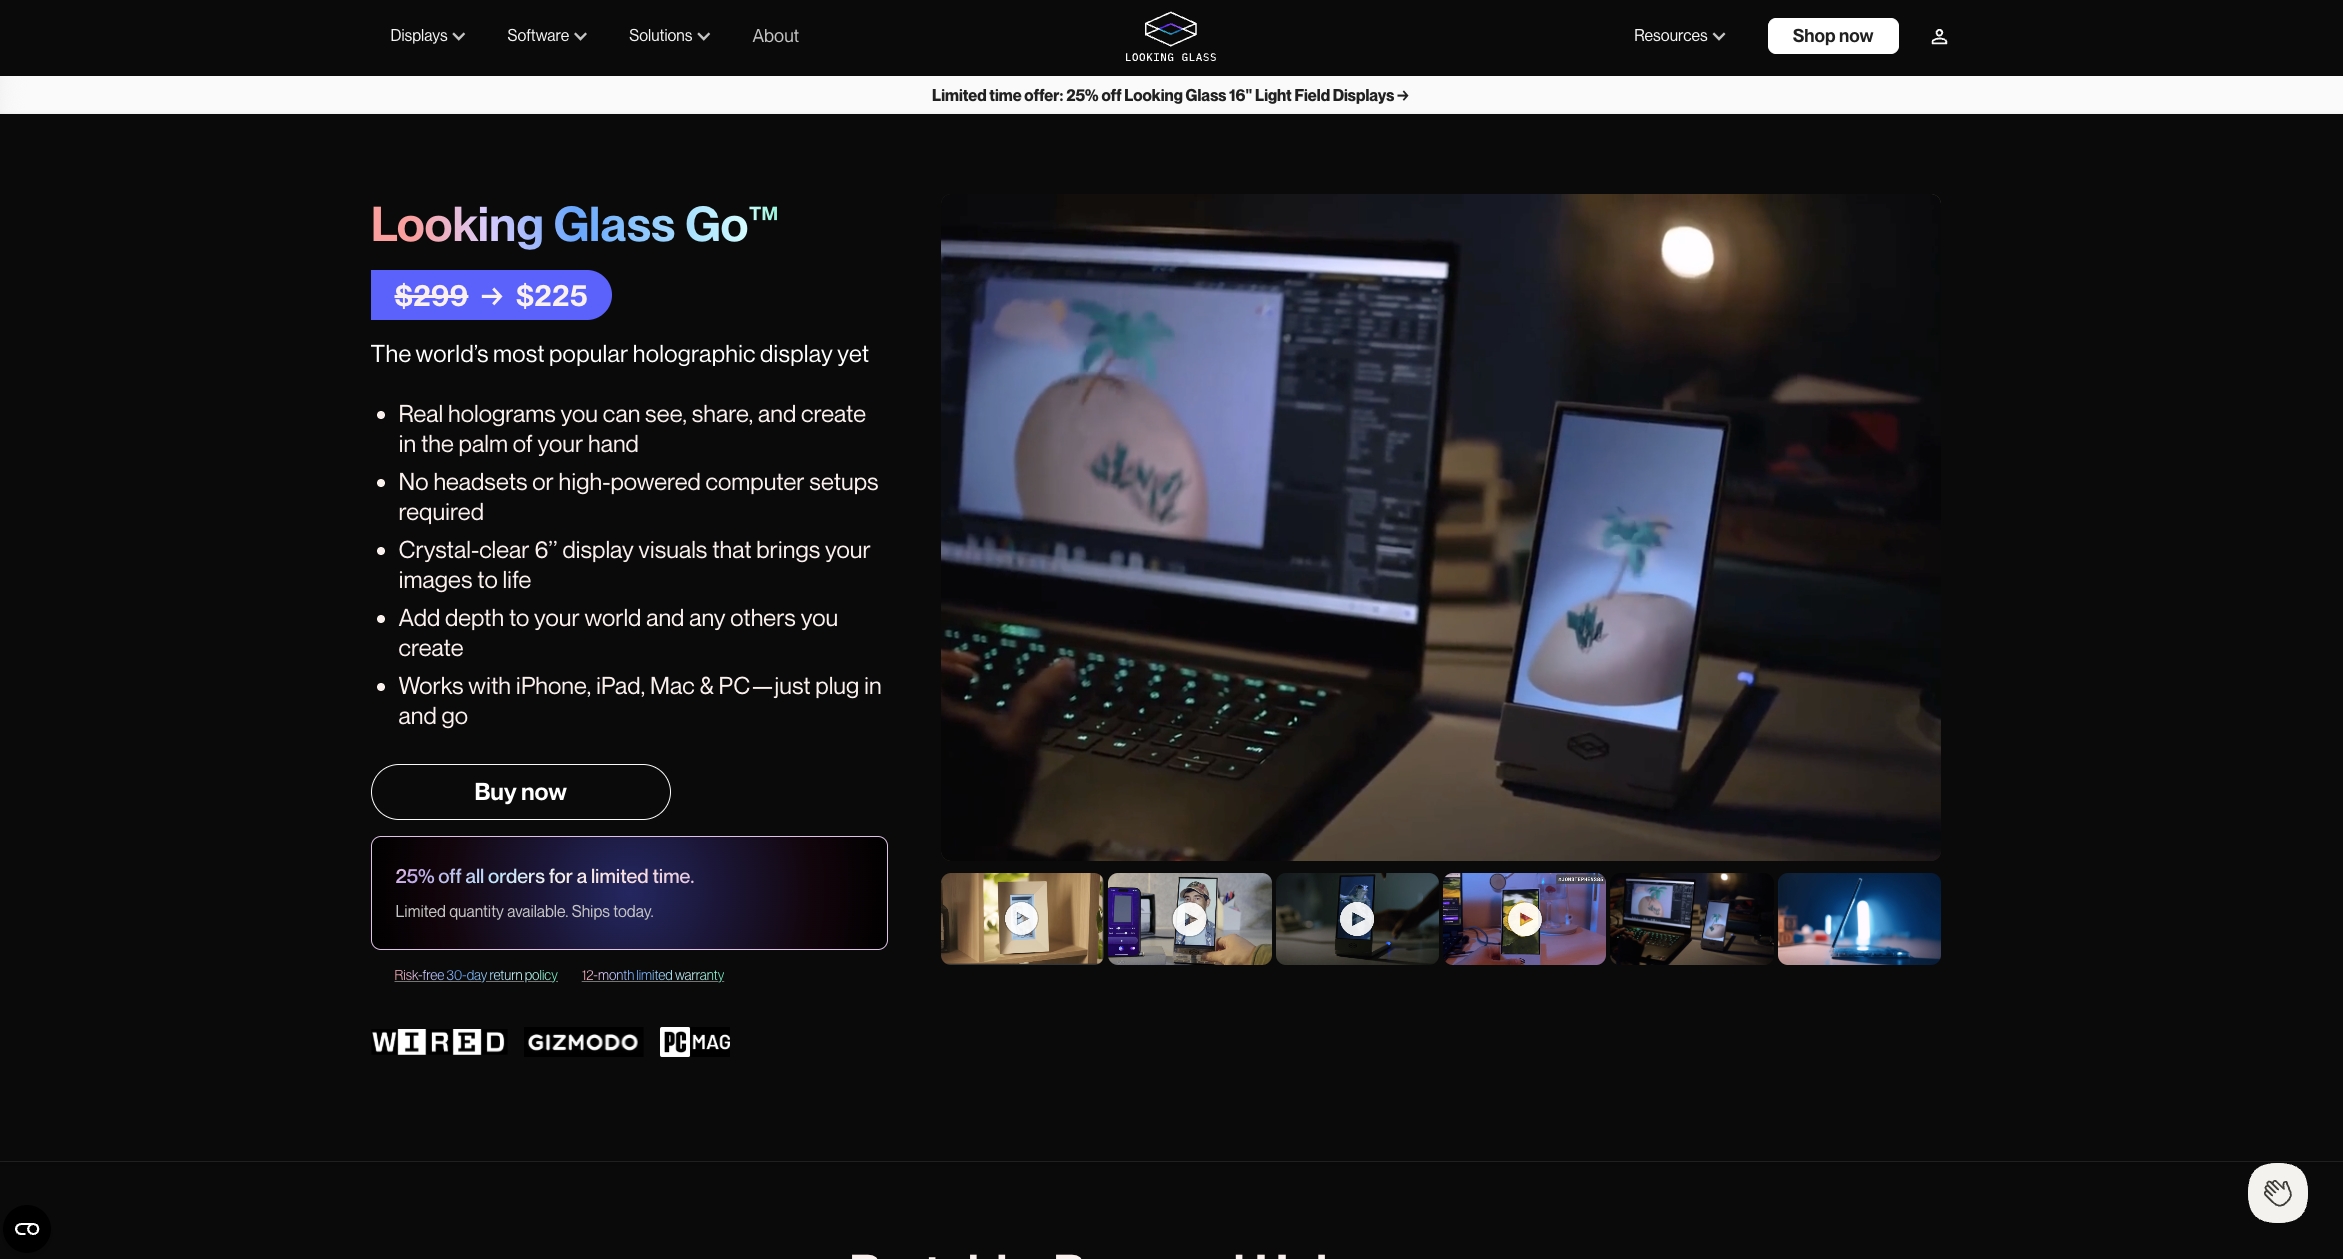
Looking Glass Go is a portable device that allows you to add your photos or 3D models and display them with a holographic effect.

It’s compact and easy to use, making it perfect for showcasing 3D scans, digital art, or interactive content without the need for special glasses. With Looking Glass Go, your creations come to life in a truly immersive way.

Tutorial: How to load your scans onto the Looking Glass Go

The video content is explained step-by-step with accompanying images.

Step 1: Go to Monocle gallery and download GLB file

  • Go to Monocle Galley and select the model you want to use
  • Press the GLB file button to download

Step 2: Open Blender

  • Open Blender
  • Delete a Cube in X key

Note

Step 3: Download Looking Glass Bridge

  • Download the version compatible with your operating system and install it

Note

Step 4: Connect the device to your computer

  • Once installed, connect the device to your computer via the provided USB-C cable
  • Once Plugged-in, press the power button
  • Make sure that the USB-C port on your computer supports display output

Step 5: Make sure the Looking Glass Go is properly connected

  • Once the device appears as a second display, open the system tray
  • Click the Looking Glass Bridge icon
  • You should see a 'device connected' message

Step 6: Download Blender add-on

Step 7: Install the add-on in Blender

  • Back in Blender and go to Edit < Preferences < Get Extensions
  • Click the top-right corner to open the drop-down menu
  • Select the 'Install from Disk'
  • Select the 'Alice LG' and click the 'Install from Disk' button

Step 8: Activate add-on

  • Go to the Add-ons tab in Preferences
  • Select the 'Alice LG' checkbox
  • Click the 'Install Dependencies' button
  • After installing it, restart Blender

Step 9: Add Camera

  • After restarting Blender, you can view the Looking Glass menu on the right-hand side.
  • Go to the 'Add' menu
  • Select the 'Camera'

Step 10: Change the camera position and create a new viewport

  • Use the transformation gizmo to move the camera into an optimal position
  • Grab the top-left corner and drag it to create a new viewport

Step 11: Add Active camera

  • Go to View > Cameras > Active Camera
  • Move your camera to an optimal position

Step 12: Set up the user interface to show the render region in Looking Glass

  • Go to Looking Glass menu
  • Select the eye drop icon in the camera setup section
  • Choose the camera you created earlier using the eye drop tool
  • The user interface is displayed

Step 13: Adjust the render region so that it fully encompasses the object

  • Use the 'Clip Start' setting to fully encompass the object
  • Use the 'Clip End' setting to fully encompass the object
  • Select the 'focal plane' and position it so that the object is centred

Step 14: Set up the lighting and ensure that the correct folder is selected

  • Go to the 'World' tab
  • Set the background colour to white
  • Go to the 'Output' tab
  • Ensure that the correct folder is selected

Step 15: Press 'Render Quilt' to generate render images

  • Click 'Render Quilt' button

Note

  • A quilt is a special file made up of a series of rendered images, which the Looking Glass interprets as a hologram.

Step 16: Save the render image

  • After the quilt has successfully rendered, go to'Image'
  • Click 'Save'

Step 17: Log in and upload the quilt image

  • Go to the Looking Glass Blocks website (https://blocks.glass/)
  • Log-in
  • Check that the device is connected by ensuring the icon in the top-right corner is green
  • Click the '+' button and select the Light Field
  • Drag the render image from blender into the application

Note

  • Block is a website that allows you to sync content to your Looking Glass Go device.

Step 18: Add the lender image to the playlist

  • Click the 'Library' button
  • Confirm that the uploaded render image is displayed
  • Select the lender image and 'Add to playlist'

Step 19: Sync to the device

  • Double-click on the Playlist
  • Click on the 'Sync to Device'

Step 20: Enjoy your hologram anywhere!

Finally, done! You can now disconnect the device and take it with you anywhare!

Display your holographic animation!

Create 3D models easily with the Monocle Prime app, download them from the Monocle Gallery, import your Monocle scans into Blender to create fun animations, and then display your holographic animation!